Professional Caulk
Smoothing Tool
Conceived by a seasoned painter with 28 years of experience. Achieve professional finishes while protecting your hands from wear and tear.
Hand Injuries
Cuts, splinters, and raw skin from rough surfaces.
Inconsistent Finish
Uneven lines and poor adhesion with improvised tools.
Time Consuming
Constant cleanup and rework with traditional methods.
Messy Application
Caulk gets everywhere, creating more cleanup work.
The Problem with Traditional Caulking
Using your finger or a rag to smooth caulk creates more problems than it solves. Professionals and DIY enthusiasts know the frustration of inconsistent results, hand injuries, and time-consuming cleanup that comes with traditional caulking methods.
The Caulking Finger Solution
We've replicated the precise feel and functionality of a human finger in the form of a caulking tool, allowing you to attain that same professional finish while protecting your hands.
Professional Finish
Achieve a smooth, professional-looking caulk finish every time. Replicates the natural shape and flexibility of a human finger.
Protects Your Hands
Eliminates splinters, raw skin, and cuts from traditional caulk smoothing. Work longer and more comfortably.
Ease of Use
Straightforward tool accessible for both professionals and DIY enthusiasts. Apply caulk evenly with less rework.
Durable & Long-lasting
Made from flexible yet durable materials. Built to withstand repeated use without losing effectiveness.
How to Use The Caulking Finger
Simple 4-step process for professional results
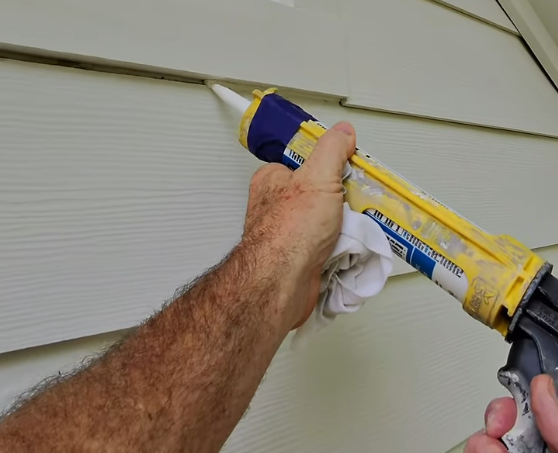
Apply the Caulk
Apply caulk to the joint using a caulk gun, creating a continuous bead along the entire length of the area to be sealed.

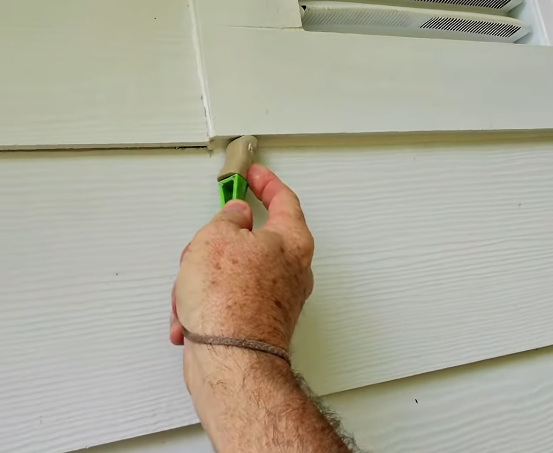
Smooth Using The Caulking Finger
Use The Caulking Finger to smooth the caulk bead, applying gentle pressure while drawing the tool along the joint for a professional finish.

Periodically Clean The Finger
Clean The Caulking Finger periodically with a damp cloth or sponge to remove excess caulk and maintain optimal performance.
Continue for Professional Finish
Continue the process along all joints, achieving consistent, professional-quality results while keeping your hands clean and protected.
What People Have to Say About Us
Trusted by professionals and DIY enthusiasts with decades of experience
"I've been painting for 53 years and I can say I sure wish they would have had this Caulking Finger tool back in old days. The person who came up with this is a genius. I give it a 10 out of a 10. Love it and will definitely use it."
- Dan M.
"This tool is amazing. I've been painting for 24 years and I've never found anything that actually worked. This Caulking Finger really works. For years my fingers have bled while caulking and this tool keeps that from happening. It's a wonderful tool for painters and I'm sure home owners would love it also."
- Judy W.
"I have been painting for 40 years, I have seen lots of tool innovations come and go. I have never been as enthusiastic about a new tool as I am The Caulking Finger. It is truly amazing, I spent a full day caulking 40 year old brick and rough cut 2x4 dental molding with no sign of wear, I never had to use my fingers."
- Frank B.
As Featured In
FARM SHOW Magazine
Use The Caulking Finger Instead Of Yours
"Why wear out your finger? Just use mine."
— Daniel Stephenson, Inventor
As a painter for more than 30 years, Daniel Stephenson's invention was inspired after a job on a big, old house took 15 cases of caulking on the outside and left him bleeding on every finger.
"I was tired of wearing my fingers out with caulk. So I decided I'd make a rubber finger," Stephenson says. He had a mold made of his index finger and experimented with various materials until he found an engineered rubber that has the right blend of flexibility and stiffness.
The patented $10 tool will last a long time when used on smooth surfaces. Contractors tell him they can caulk three houses with The Caulking Finger and that it saves them time.
"I can caulk with gloves on and never touch the caulk," Stephenson says.
Daniel Stephenson
Inventor of The Caulking Finger
Ready to Purchase?
Join thousands of professionals and DIY enthusiasts who trust The Caulking Finger